Alongside other project types such as Networks, Datasets and Tilesets, Podaris features a project type called Streets, designed to store a collection of street networks.
In this tutorial, we are going to look at how to use the third-party application OSM iD, an editor for OpenStreetMap (OSM) in order to edit and export a OSM changeset for use in Podaris.
Step-by-step Walkthrough
Step 1:
Go to www.openstreetmap.org and zoom into the area you would like to edit.
Step 2:
Click on the down arrow next to edit and select Edit with iD.

Step 3:
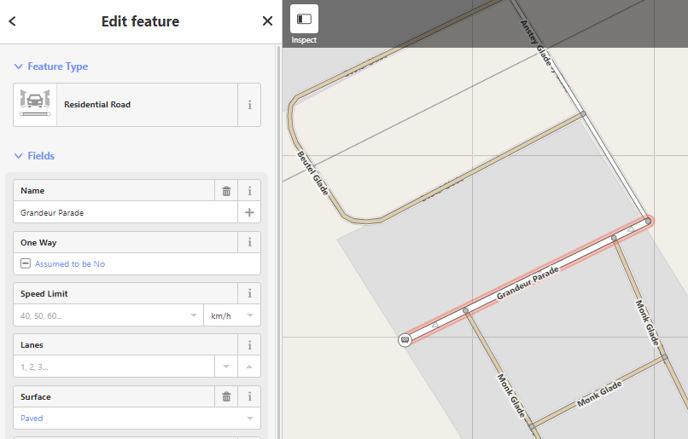
Click on a feature to edit the tags. This allows you to make changes to feature type, maximum speed and access.
 Step 4:
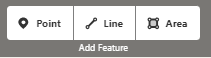
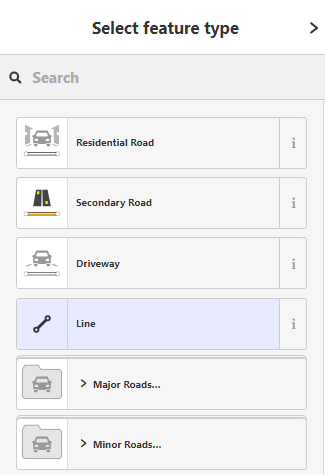
You can also create new features by clicking on Point, Line or Area at the top of the map. To create a new road, footway or cycleway, click line.
Step 5:
If your feature connects to an existing feature, click on the existing feature to ensure they are connected. You can click on the map to add a point at corners and intersections. Once you have finished drawing the road, click esc on your keyboard to stop drawing.
You can then set the type of feature, and tags such as maximum speed and access on the left hand side.
Step 6:
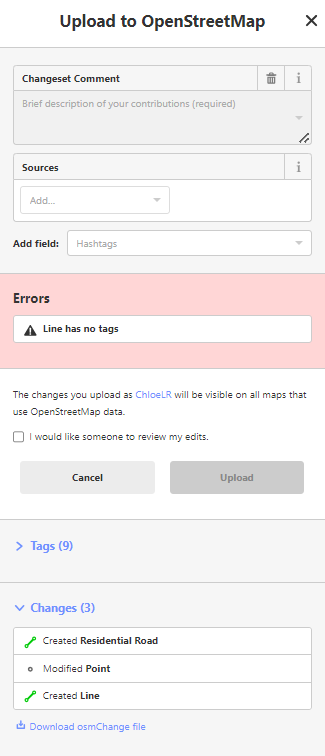
Once you have made your changes, click on the save button in the top left. This will show all of the changes you made as well as any warnings.
Once you are happy, click Download osmChange file to download the changeset.
Step 7:
Now you've made your street network changes and downloaded the associated osmChange file, the next step is to download an OSM PBF to apply the change file to.
What is an OSM PBF?
- An OSM PBF is a binary file of an OSM XML file that contains street network information like road links, pedestrian paths, junctions etc.
- The OSM PBF you download to use for your street network should cover the entire area of analysis (not just the area of changes). For example, if you want to generate 3hr isochrones from a point, then you want the entire OSM area that covers that 3hr reach to be in your PBF extract.
- Your osmChange file is a difference of changes that you make to the PBF file (e.g. add links, remove footpath etc.). These changes are optional; you can just provide a PBF with no changes applied, but if you provide both a PBF and osmChange file then the change file changes will be applied on top of the PBF
To source the PBF file, you have a few options:
- Use a QGIS plug-in
- Source from the OSM website
- Source from the Geofabrik website - this can be used when you're happy to use a pre-cut region (although sometimes these files can exceed the maximum file size)
You need to download this as an .osm.pbf file ready for use in Podaris.
When you have sourced both the PBF and the osmChange file, you can create a new street network in Podaris.
Step 8:
To set up your new street network in Podaris, in the homepage of Podaris go to the "more" dropdown and select Streets.

If you can't see the Streets option in the dropdown menu, please get in touch with the team at support@podaris.com and a member of our team will enable this feature on your account
Then click to add new streets.

When you do this you'll be prompted to set the privacy and location settings of the street network, before getting through to the Street Network Settings.
Next, go to the Setup Streets tab and add your PBF file as the Network and your osmChange file as the Change File.

Then click Finish Setup to save your changes.

Step 9:
To apply this newly created street network to a project, go to the project's settings and in the general settings tab you will see (at the bottom of the page) the option to change your street network from the default to the street network you just created

Then click Save to save these changes.