![podaris_logo_png.png]](https://support.podaris.com/hs-fs/hubfs/podaris_logo_png.png?height=50&name=podaris_logo_png.png)
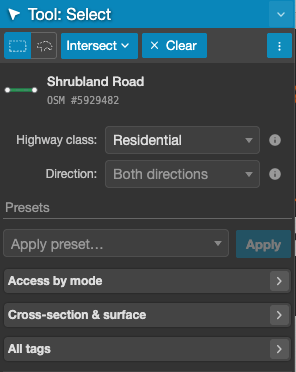
Press S or click the Select tool  , then click a link on the map. Clicking a junction instead opens a different panel, covered in Junctions and Turn Restrictions.
Reading the link card
The card at the top shows the street name, which you can click to rename, and the link's identifier. If the link came from OpenStreetMap, the identifier is a link that opens the same object on openstreetmap.org.
Two badges appear when they apply. A link drawn in this session is marked New link  . A link queued for deletion is marked deleted, and its fields lock until you restore it. Whenever the selection has unpublished edits, a red discard button
  appears in the card to roll them back.
Below the card sits a read-only access chip (e.g. 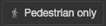 ) summarising who can currently use the link, with an icon per mode and "(timed)" appended when the restriction only applies at certain times. It is a summary of the tags underneath, so it updates as you edit.
Highway class and direction
Two fields sit at the top of the editor:
- Highway class is what kind of road this is, from Motorway down to Footway, plus Busway, Cycleway, Path and Pedestrian. It sets the default access for every mode, so changing it is the single biggest change you can make to a link.
- Direction is whether traffic runs both ways, one way along the link, or one way against it. One-way links show direction arrows on the map.
Access by mode
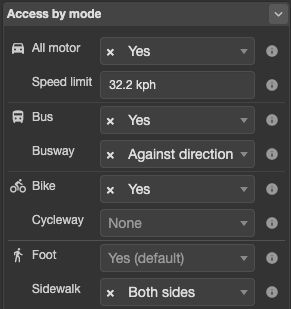
A row per mode: All motor, Bus, Bike and Foot. Each is set to Yes, No, or Private (or left at its default).
The default is worked out from the highway class and any other tags you have set, and shown in the field, for example "Yes (default)" or "No (default)". Hovering over it explains where that default came from, so you can see whether a footpath is closed to cars because you closed it or because footpaths are closed to cars anyway. You only need to set a mode explicitly when you want to override the default.
When a mode is allowed, a second row appears beneath it for the detail that only makes sense if it is:
| Mode | Extra field |
| All motor | Speed limit, in your project's units. Used for routing. |
| Bus | Busway: bus lane, contraflow bus lane, or busway in both directions. |
| Bike | Cycleway: painted lane, protected track, shared lane and so on. |
| Foot | Sidewalk: both sides, one side, none, or mapped separately. |
Set a mode to No and its extra field disappears, along with the tag behind it, so you cannot leave a bus lane recorded on a street buses cannot use.
Cross-section, surface and other tags
Cross-section and surface holds width, surface, smoothness, street lighting and incline. The router uses surface and smoothness for calculations, where for example, a rough or unpaved surface slows cycling down or rules it out entirely.
All tags holds everything else the link carries, as a key and value list you can add to. Use it for anything the fields above do not cover, such as bridge and tunnel tags or a time window other than the standard school-street one. Note that the additional tag you may add may not reflect routing, but can be used for bulk selection, filtering, and even in some Insight analyses like the Street Catchment analysis.
If you are unsure what a tag means, every field has an information button explaining what it does to routing and linking to the OpenStreetMap reference for that tag.
Applying an intervention with a preset
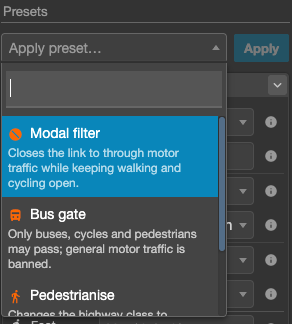
Presets apply a complete, consistent set of access rules in one click. Choose one from Apply preset… and click Apply. They work on a single link or on a bulk selection.
| Preset | What it does |
| Modal filter | Closes the link to through motor traffic while keeping walking and cycling open. The building block of a low-traffic neighbourhood. |
| Bus gate | Only buses, cycles and pedestrians may pass. General motor traffic is banned. |
| Pedestrianise | Changes the highway class to pedestrian and allows walking only. |
| School street | Bans motor traffic on school days at drop-off and pick-up, Monday to Friday 08:00 to 09:30 and 15:00 to 16:00, leaving walking and cycling open at all times. |
A preset is an action, not a label. Applying one sets the access rules it owns and clears any conflicting ones, so the result is the same whatever the link looked like before. Podaris confirms with "applied", or tells you it "is already in effect" if nothing needed changing.
Note: The School street window is fixed when the preset is applied. To use different hours or days, apply the preset and then edit the time window under All tags.
Tip: A timed intervention only shows up in analysis if the analysis is time-aware. When you run an isochrone on this network, switch Time-aware on and set the day and departure time to see a school street actually closed. Left off, the result ignores the time window.
Placing crossings and signals
Place feature… adds a point feature to the selected link: a pedestrian crossing, traffic signals, a stop sign, or a give way. Choose the type, then click the point on the link where it belongs. The feature is spliced into the road at the next rebuild.
To set the control at a point where links already meet, use the junction's own type setting instead. See Junctions and Turn Restrictions.
Reshaping a link
Drag a junction to move it, and the links attached to it follow. Drag one junction onto another and Podaris joins them into a single junction instead, which is how you connect two roads that only appear to meet.
You can also drag a point along a link to insert a new vertex and bend it.
Editing many links at once
There are three ways to build a selection, and all of them lead to the same panel.
- Shift-click links on the map to add or remove them one at a time.
- Select by area: choose the rectangle or polygon button
 at the top of the panel, then outline the area on the map. The dropdown next to the shape buttons controls whether links merely touching the area are included.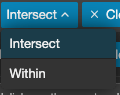
- Select by attribute: in the overflow menu
 , search for links by tag, for example every link where the highway class is residential.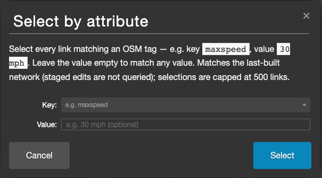
The panel then shows how many links are selected and the same editing fields as a single link, with blanks where the selection disagrees. Anything you change, including presets, applies to every selected link as one undo step. Delete N links, or just pressing Delete, marks them all for deletion in one step.
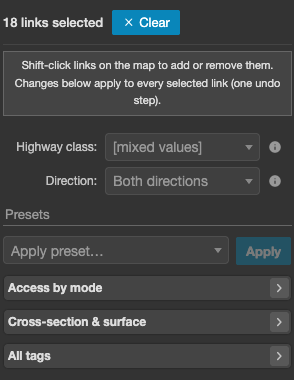
Note: A selection is capped at 500 links. If you hit the cap, outline a smaller area or narrow the attribute query.
Messages you may see
| Message | What to do |
| Selection capped at 500 links. | Outline a smaller area or narrow the query. |
| Enter an OSM tag key to select by | Select by attribute needs a tag key, such as highway or surface. |
| This link is marked for deletion. Restore it before editing its attributes. | Un-stage the deletion with the Street Erase tool, or undo it. |
| Network data unavailable | The network has not finished building, or the build failed. Check the Setup Streets page. |